Publish your radiation data from GC-01 using Raspberry Pi
Table of Contents
- Why Monitor and Publish Radiation Data?
- Hardware Overview: GC-01 Geiger Counter
- Setting Up the Hardware Connection
- Raspberry Pi Software Setup
- Create Accounts on Radiation Data Services
- Clone the radpro-tool to Raspberry Pi
- Install Python venv to Run the radpro-tool
- Identify the GC-01 Serial Port
- Running the radpro-tool
- Automating Data Collection with Systemd
- Data Verification and Monitoring
- Conclusion
- Additional Resources
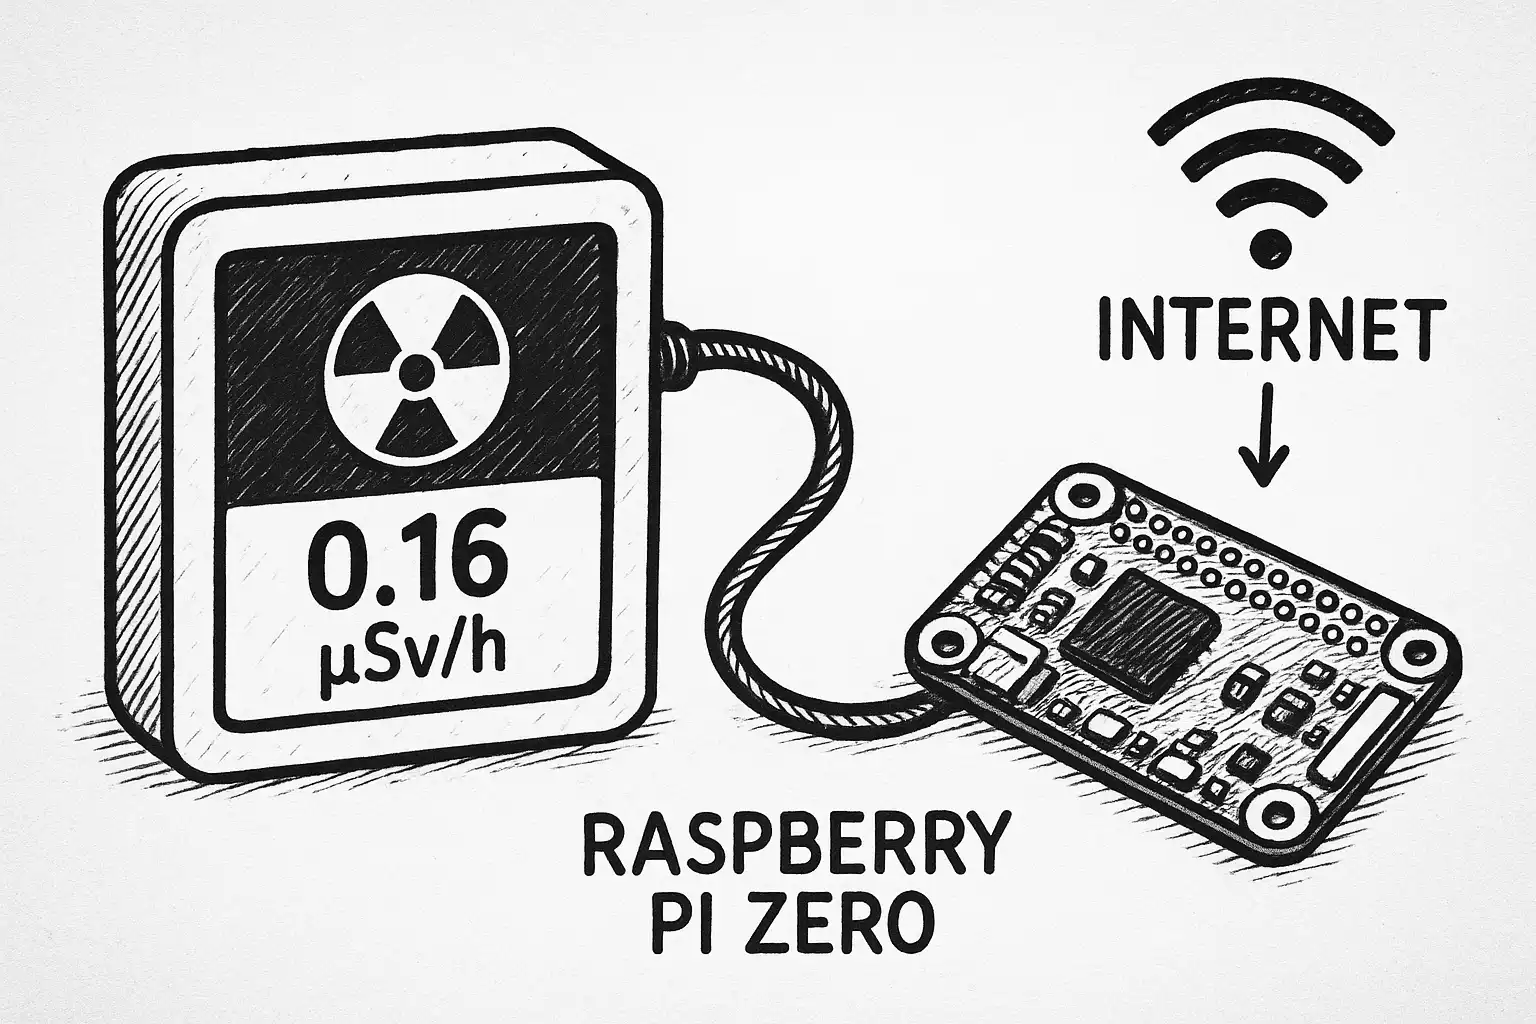
The GC-01 Geiger counter is an excellent, affordable radiation detection device that produces reliable measurements suitable for environmental monitoring. In this comprehensive guide, we’ll explore how to interface this detector with a Raspberry Pi to create an automated radiation monitoring system that publishes data to any of the following services:
- gmcmap.com
- radmon.org
- safecast.org
Why Monitor and Publish Radiation Data?
Monitoring and publishing radiation data is crucial for several reasons:
- Public Safety: By sharing real-time radiation levels, communities can stay informed about potential hazards.
- Environmental Awareness: Continuous monitoring helps track changes in radiation levels due to natural or man-made events.
- Scientific Research: Open data contributes to a better understanding of radiation patterns and their effects on health and the environment.
- PURE SCIENCE FUN: Engaging in radiation monitoring fosters curiosity and learning about nuclear science and environmental health.
Hardware Overview: GC-01 Geiger Counter
The GC-01 is a compact radiation detection device based on the Geiger-Müller M4011 or equivalent tube. Key specifications include:
- Detection Range: 0.1 μSv/h to 1000 μSv/h
- Communication: USB serial interface for data output
- Battery: 1100mAh battery (about 20 hours of operation)
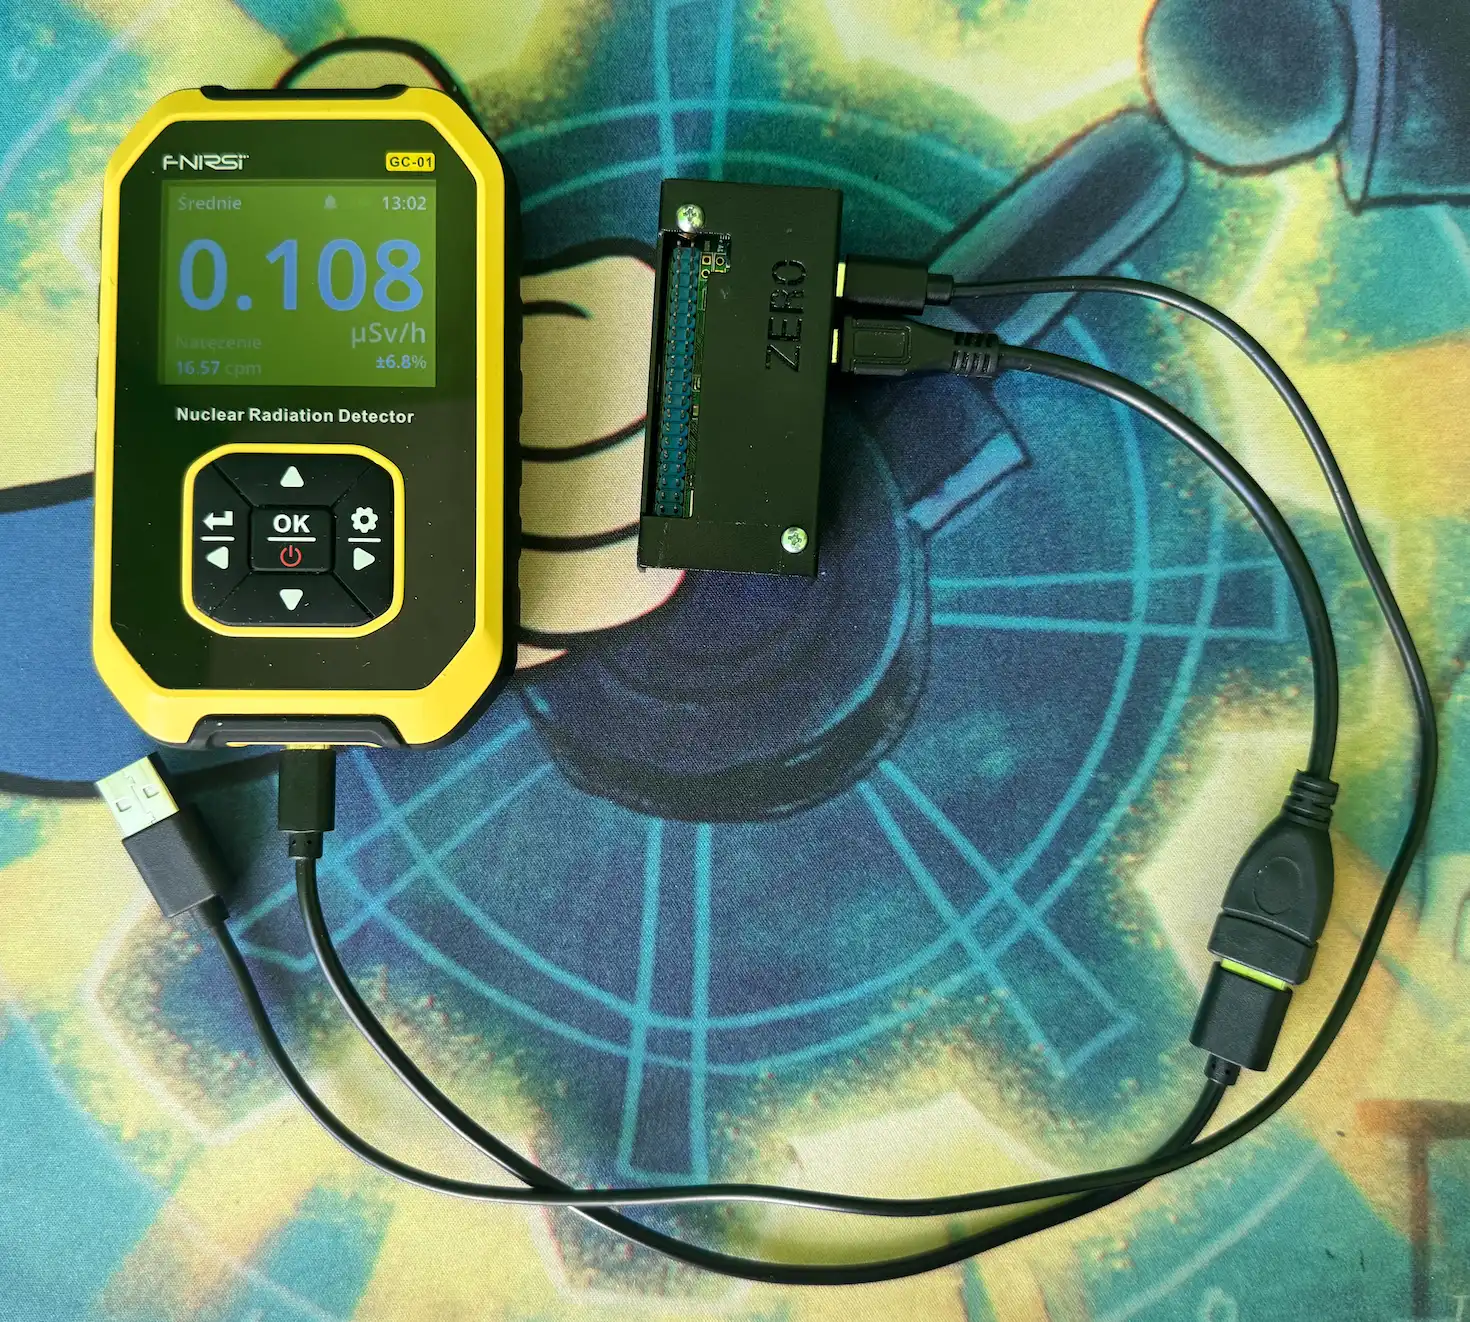
Setting Up the Hardware Connection
Required Components
- Raspberry Pi Zero (but can be basically any Raspberry Pi)
- GC-01 Geiger counter with RADPRO Firmware (or any other counter with RADPRO firmware and USB like GQ GMC-800)
- MicroSD card (32GB recommended)
Wiring Configuration
The GC-01 connects to the Raspberry Pi Zero using USB OTG. You can use a USB OTG adapter cable to connect the GC-01’s USB port to the Raspberry Pi Zero’s micro USB port. Alternatively, you can use a regular Raspberry Pi with a normal USB port.
Raspberry Pi Software Setup
Initial System Configuration
Start with a fresh Raspbian OS installation and update the system: https://www.raspberrypi.com/documentation/computers/getting-started.html
After that, connect to your Raspberry Pi via SSH or terminal and run the following commands:
# Update system packages
sudo apt update && sudo apt upgrade -y

# Install required development tools
sudo apt install python3-pip python3-venv git nano -y
These commands will ensure your Raspberry Pi is up to date and has the necessary tools for the project.
Flashing the GC-01 Firmware (RADPRO)
Using instructions from: https://github.com/Gissio/radpro/blob/main/docs/devices/FNIRSI%20GC-01/install.md
Installing Rad Pro on FNIRSI GC-01/JOY-IT JT-RAD01 Geiger counters
This guide explains how to install the Rad Pro firmware on FNIRSI GC-01 and JOY-IT JT-RAD01 Geiger counters.
What you’ll need
- USB data cable: Must support data transfer, not just charging.
- Philips screwdriver: For opening the device.
Open the device
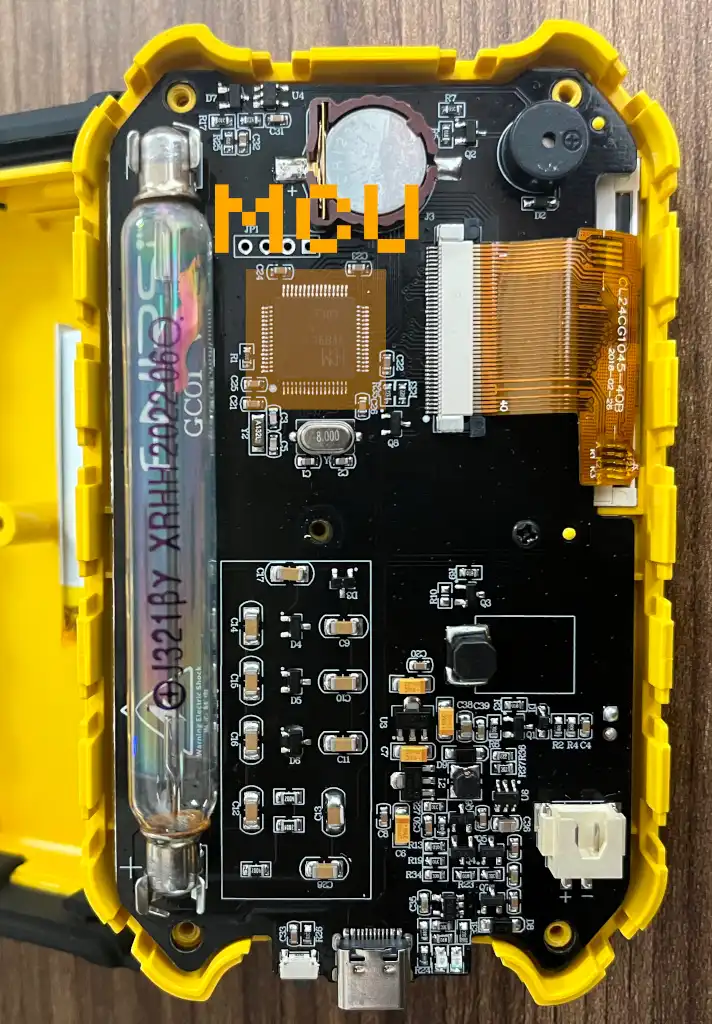
- Power off the device.
- Unscrew the back case and carefully open the device.
- Identify the microprocessor (square chip): either CH32F103R8T6 (WCH) or APM32F103RBT6 (Geehy). If unmarked, proceed to the next step.
- Identify the Geiger-Müller tube, marked as J305, J321, J613, J614, or M4011. For unmarked tubes:
- 55 mm tubes: Assume J614.
- 65 mm tubes: Assume J613.
- Reassemble the device.
Flash the firmware
- Download and extract the latest
radpro-[version].zipfrom Rad Pro releases. - Connect the device to a Windows computer using a USB 2.0 port and the USB data cable. Note: Installation may fail on macOS, Linux, or USB 3.0 ports.
- Power on the device. A USB drive should appear on your computer. If it does not, the device may be incompatible with Rad Pro.
- If you identified the microprocessor, navigate to the
fnirsi-gc01_[microprocessor]/installfolder. Select the appropriate firmware file:radpro-fnirsi-gc01_[microprocessor]-[language]-x.y.z-install.bin.[microprocessor]:ch32f103r8t6orapm32f103rbt6.[language]: Two-letter code for your preferred language (e.g.,enfor English).
- If the microprocessor is unmarked, try
apm32f103rbt6firmware first. If a Drive full error occurs, disconnect the device, then retry withch32f103r8t6. - Copy the selected firmware file to the USB drive. The device should restart automatically with Rad Pro installed.
Note:
- Some devices require holding the Power button from power-on until the firmware is copied and the device restarts.
- Others may need the Right/Settings and OK/Power keys pressed together to make the USB drive available.
- Some users report that it is necessary to copy the file to the USB drive twice.
Troubleshooting:
- If the installation fails, press the reset switch next to the USB connector and repeat the process.
- More troubleshooting steps can be found in the original instructions on GitHub: https://github.com/Gissio/radpro/blob/main/docs/devices/FNIRSI%20GC-01/install.md
Configure the device
Use the following controls to operate your device:
- Power on/off: Press and hold the OK/Power key.
- Switch measurement mode: Use the Up or Down key.
- Switch secondary measurement view: Press the Left/Back key.
- Reset measurement/dismiss alert: Press and hold the Left/Back key.
- Toggle pulse sound (measurement view only): Press and hold the Right/Settings key.
- Sleep display (measurement view only): Press the OK/Power key.
- Access settings: Press the Right/Settings key.
- Navigate options: Use the Up or Down key.
- Select option: Press the OK/Power or Right/Settings key.
- Go back: Press the Left/Back key.
- Toggle lock mode: Press and hold both the Left/Back and OK/Power keys.
To configure the device:
- Go to Settings > Geiger tube > Sensitivity and select the option that matches your Geiger-Müller tube.
- Go to Geiger tube > HV Profile and select:
- Energy-saving: Lowest power use, best for background radiation.
- Accuracy: Higher power use, ideal for elevated radiation levels.
- Factory default: Highest power use, matches original firmware settings.
- If the device registers unintended key presses, select the Energy-saving HV profile or configure a custom HV profile to resolve the issue.
Support Rad Pro
If you find Rad Pro useful:
- Watch the Rad Pro GitHub repository for release updates.
- Star the project to show your support.
Create Accounts on Radiation Data Services
To publish your radiation data, you’ll need to create an account on one of the supported services. Follow the instructions on their respective websites to set up your account and obtain any necessary API keys or credentials for data submission. Links:
The script that will be used in the next sections supports all of the above services in parallel, so you can create accounts on all of them if you want.
Clone the radpro-tool to Raspberry Pi
You need to install the radpro-tool on your Raspberry Pi. This tool will read data from the GC-01 and publish it to the selected radiation data services.
git clone https://github.com/CalmWookie/radpro.git # Clone the repository
cd radpro # Navigate to the radpro directory
Install Python venv to Run the radpro-tool
The Python virtual environment is a handy tool to manage dependencies for your project. It allows you to create an isolated environment for your Python projects, ensuring that each project can have its own dependencies without interfering with others. On Raspberry Pi, there are often problems with installing Python packages globally, so venv is a good solution for that.
python3 -m venv venv # Create a virtual environment named 'venv'
source venv/bin/activate # Activate the virtual environment
cd tools # Navigate to the tools directory
pip install -r requirements.txt # Install required packages
This will create a virtual environment and install the required Python packages.
Identify the GC-01 Serial Port
To find the serial port where your GC-01 is connected, you can use the following command:
ls /dev/ttyUSB*
# or for Raspberry Pi Zero with USB OTG
ls /dev/ttyACM*
For Raspberry Pi Zero with USB OTG, it might show up as /dev/ttyACM0 or similar. Make a note of this port, as you’ll need it to configure the radpro-tool.
Running the radpro-tool
- Submit data to gmcmap.com:
python radpro-tool.py \
  --port /dev/ttyACM0 \
--submit-gmcmap [USER_ACCOUNT_ID] [GEIGER_COUNTER_ID]- Submit data to radmon.org:
python radpro-tool.py \
  --port /dev/ttyACM0 \
--submit-radmon [USERNAME] [DATA_SENDING_PASSWORD]- Submit data to safecast.org with location data:
python radpro-tool.py --port /dev/ttyACM0 \
  --submit-safecast [API_KEY] [DEVICE_ID] \
  --safecast-latitude 37.7749 --safecast-longitude -122.4194 \
--safecast-height 100.5- You can also combine multiple services in one command:
python radpro-tool.py --port /dev/ttyACM0 \
  --submit-gmcmap [USER_ACCOUNT_ID] [GEIGER_COUNTER_ID] \
  --submit-radmon [USERNAME] [DATA_SENDING_PASSWORD] \
  --submit-safecast [API_KEY] [DEVICE_ID] \
  --safecast-latitude 37.7749 --safecast-longitude -122.4194 --safecast-height 100.5
Automating Data Collection with Systemd
To continuously collect and publish radiation data, you’ll want to set up the radpro-tool as a system service. This ensures your radiation monitoring system runs automatically on boot and restarts if it crashes.
Creating a Systemd Service
Create a new service file:
sudo nano /etc/systemd/system/radpro-monitor.serviceAdd the following configuration (replace the paths and parameters with your specific values):
[Unit]
Description=RadPro Radiation Monitoring Service
After=network.target
Wants=network.target

[Service]
Type=simple
User=pi
WorkingDirectory=/home/pi/radpro/tools
Environment=PATH=/home/pi/radpro/venv/bin
# Make sure to replace the parameters below with your own
ExecStart=/home/pi/radpro/venv/bin/python /home/pi/radpro/tools/radpro-tool.py --port /dev/ttyACM0 --submit-gmcmap [USER_ACCOUNT_ID] [GEIGER_COUNTER_ID]
Restart=always
RestartSec=10
StandardOutput=journal
StandardError=journal

[Install]
WantedBy=multi-user.target
Enabling and Starting the Service
Enable and start the service to begin automatic data collection:
# Reload systemd daemon
sudo systemctl daemon-reload

# Enable service to start on boot
sudo systemctl enable radpro-monitor.service

# Start the service immediately
sudo systemctl start radpro-monitor.service

# Check service status
sudo systemctl status radpro-monitor.service
Monitoring Service Logs
You can monitor the service logs to ensure everything is working correctly:
# View recent logs
sudo journalctl -u radpro-monitor.service -f

# View logs from the last hour
sudo journalctl -u radpro-monitor.service --since "1 hour ago"
Data Verification and Monitoring
Checking Data Submission
After setting up your monitoring system, verify that data is being submitted correctly:
- GMCMap.com: Log into your account and check the map to see if your radiation readings appear
- Radmon.org: Visit your station’s page to confirm data updates
- Safecast.org: Check the Safecast map for your location and device
Conclusion
Setting up a GC-01 Geiger counter with Raspberry Pi for automated radiation monitoring provides an excellent way to contribute to environmental awareness and scientific research. This comprehensive guide has covered:
- Hardware setup and connections
- Firmware installation with RadPro
- Software configuration and automation
- Data submission to multiple monitoring networks
By following this guide, you’ll have a reliable, automated radiation monitoring station that contributes valuable data to the global radiation monitoring network. The combination of affordable hardware and open-source software makes environmental monitoring accessible to everyone, fostering a more informed and engaged community.
Next Steps
Consider expanding your monitoring setup with:
- GPS modules for mobile monitoring applications
- Local web dashboard for real-time visualization (for example, using Grafana)
- Data analysis scripts for trend identification
Your contribution to radiation monitoring helps build a comprehensive understanding of our environment and supports public safety initiatives worldwide. Happy monitoring!